
Steps for Smart SIM Registration Online (2026)
Registering your Smart SIM online is a simple process that only takes a few minutes if you have your mobile phone and required documents ready. Follow the step-by-step guide below to complete your Smart SIM registration through the official portal.
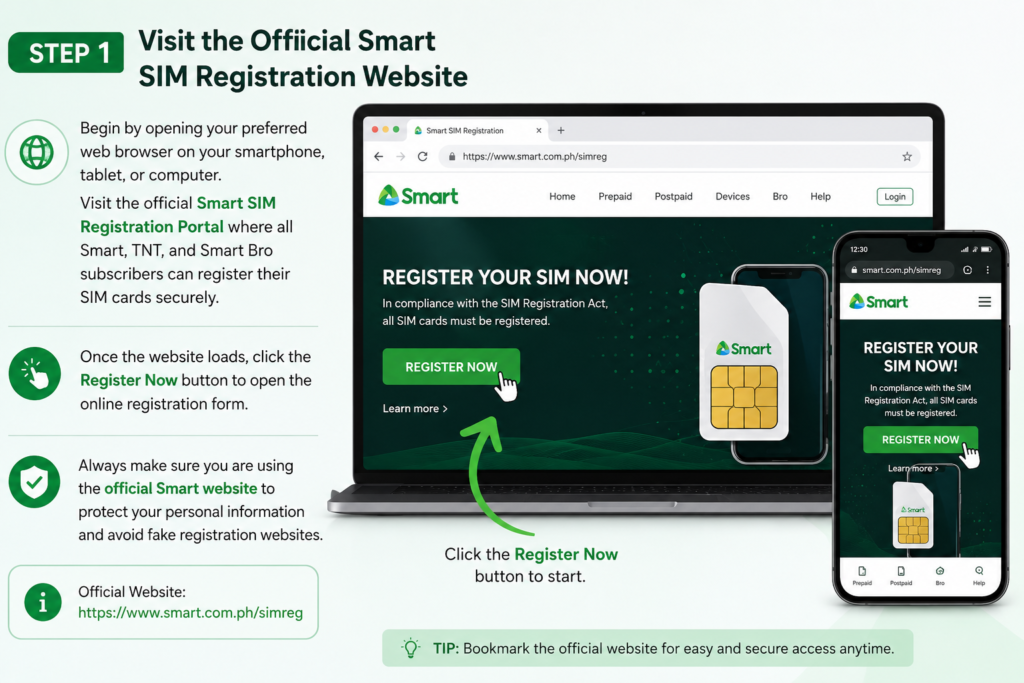
Step 1: Visit the Official Smart SIM Registration Website
Begin by opening your preferred web browser on your smartphone, tablet, or computer. Visit the official Smart SIM Registration Portal where all Smart, TNT, and Smart Bro subscribers can register their SIM cards securely.
Once the website loads, click the Register Now button to open the online registration form. Always make sure you are using the official Smart website to protect your personal information and avoid fake registration websites.
Step 2: Enter Your Smart Mobile Number
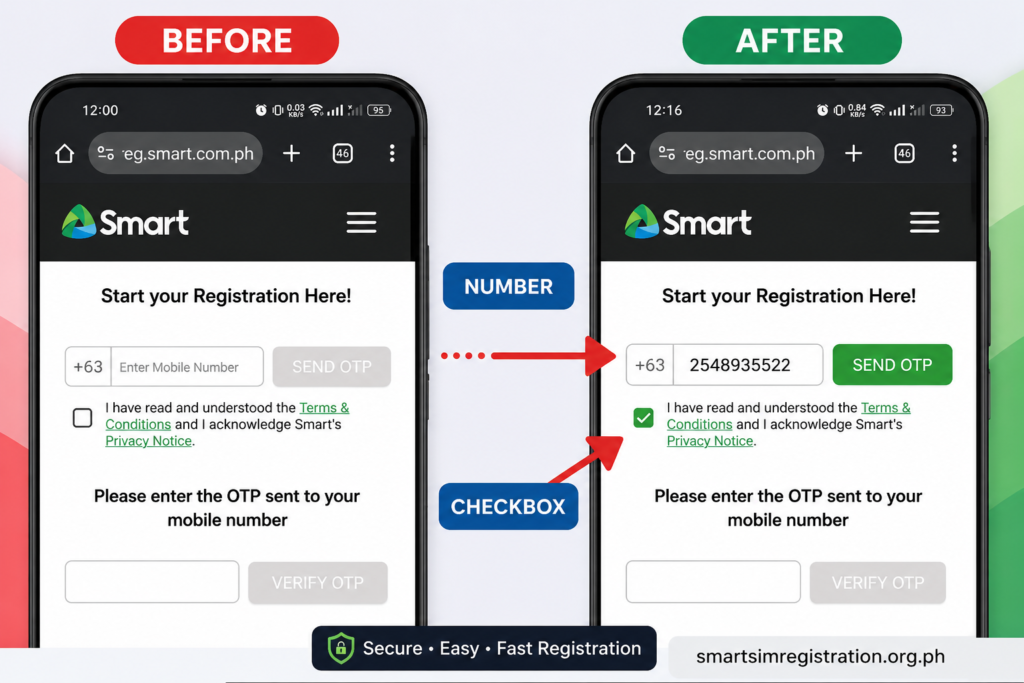
After opening the registration form, scroll down until you see the mobile number field. Enter your active 10-digit Smart mobile number carefully.
Before continuing, read the Terms and Conditions and tick the checkbox to confirm that you agree with Smart’s registration policy. Once everything is correct, click the Send OTP button to receive your verification code.
Make sure the mobile number you enter is active because Smart will send the verification code to this number.
Step 3: Verify the OTP Code
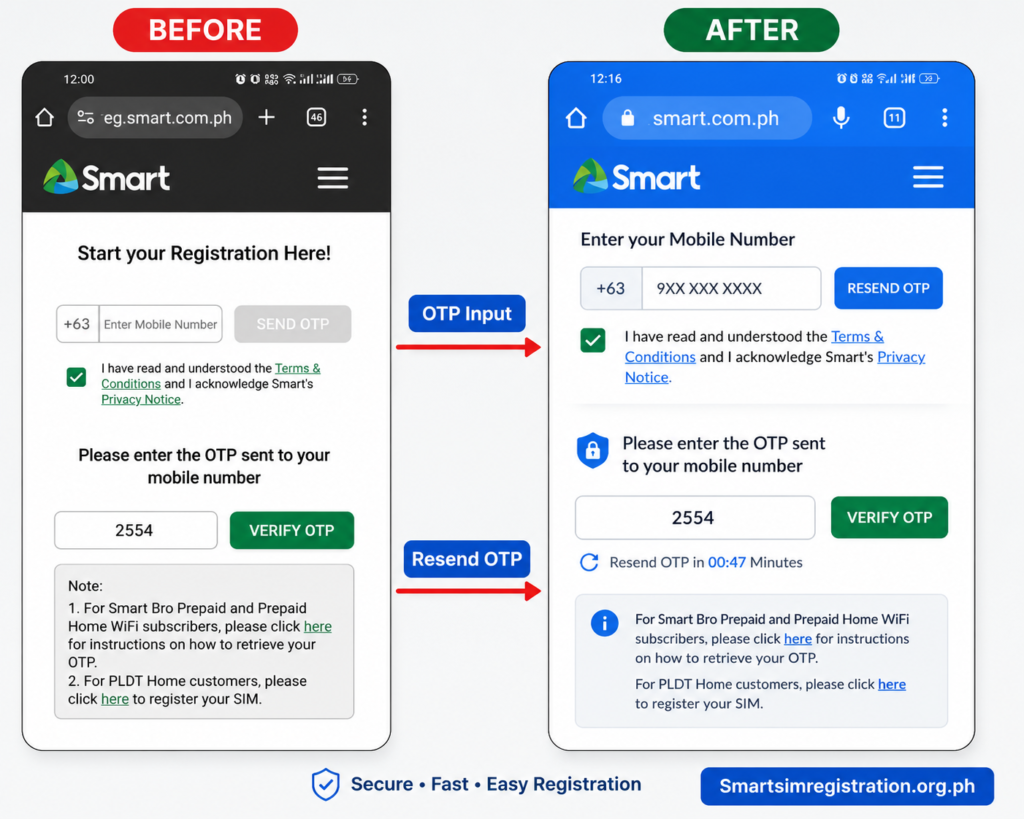
Within a few seconds, Smart will send a One-Time Password (OTP) to your mobile phone via SMS.
Open your Messages app, copy the OTP, and enter it into the verification field on the registration page. After entering the code, click Verify OTP.
If you do not receive the OTP immediately, wait for about 90 seconds. If the message still does not arrive, simply click Resend OTP to request a new verification code.
The OTP is only valid for a limited time, so enter it as soon as possible.
Step 4: Confirm OTP Verification
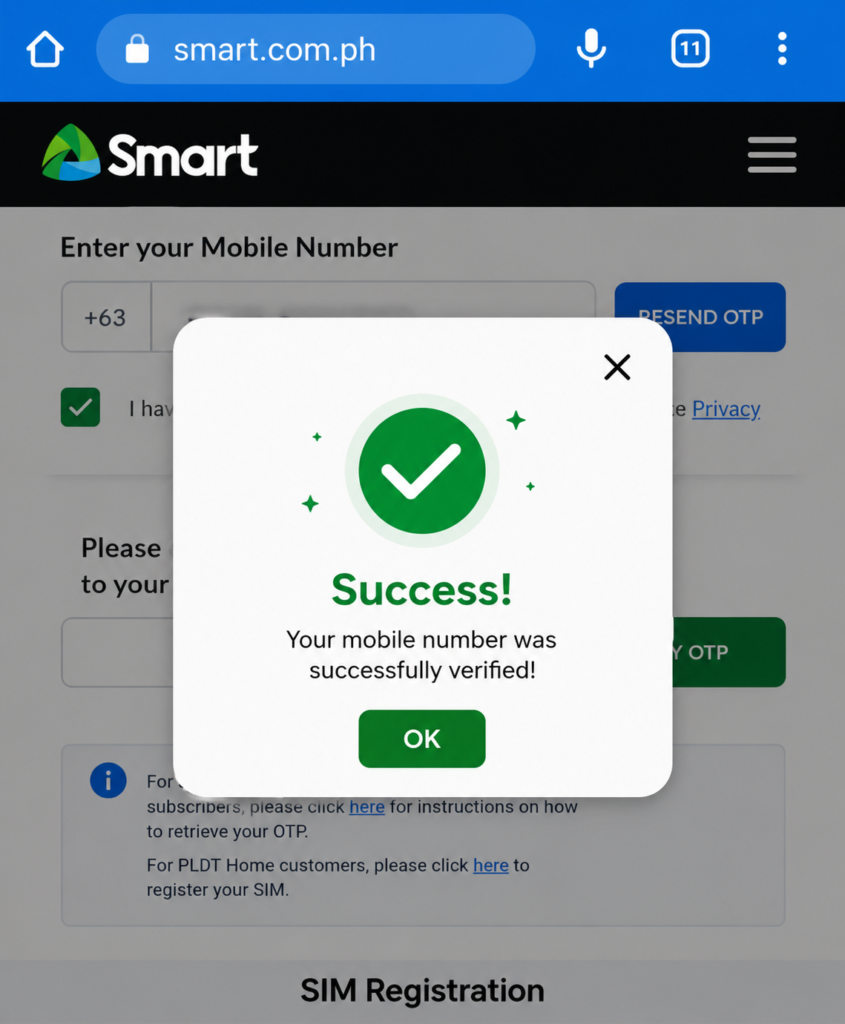
If the OTP is correct, Smart will display a confirmation popup informing you that your mobile number has been successfully verified.
Click OK to continue with the registration process.
This verification confirms that you are the owner of the Smart SIM card and allows you to proceed to the identity verification section.
Step 5: Select Your Nationality and Upload Your Valid ID
On the next page, choose your nationality from the available options.
After selecting your nationality, choose the type of government-issued ID you want to use for verification. Upload a clear and readable photo of your ID. Ensure that your full name, ID number, address, and other important details are clearly visible.
You will also be asked to upload a recent selfie. The selfie should clearly show your face without sunglasses, masks, or heavy filters.
Blurry or cropped images may delay your registration, so upload high-quality photos whenever possible.
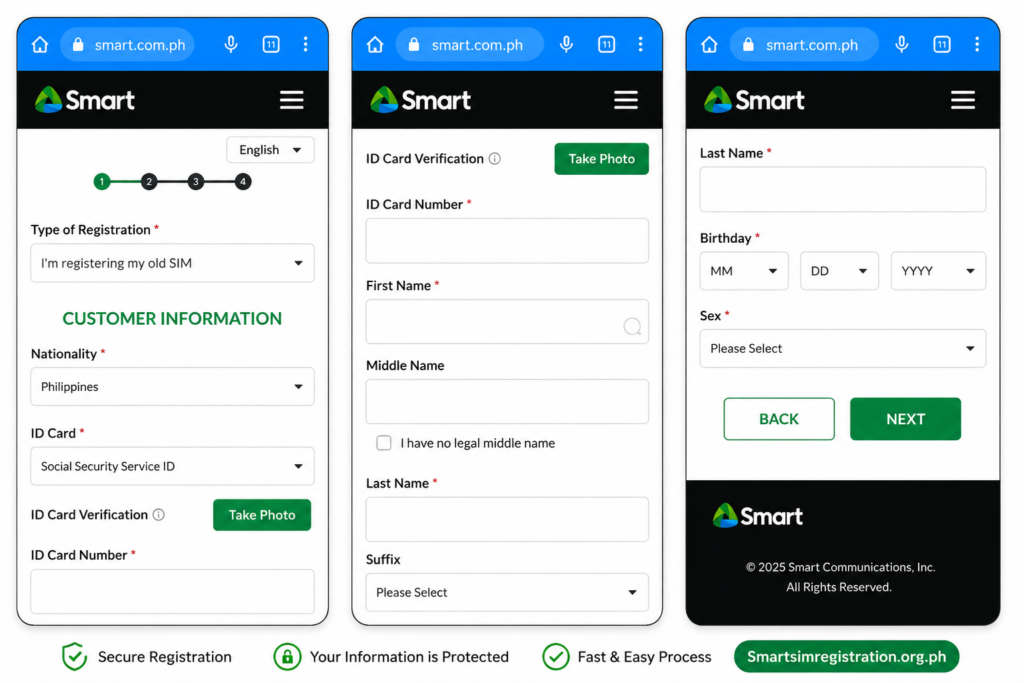
Step 6: Fill in Your Personal Information
After uploading your documents, complete the online registration form with your personal details.
Enter your:
- Full Name
- Date of Birth
- Gender
- Nationality
- ID Number
Make sure every detail matches the information printed on your government-issued ID. Double-check your spelling before moving to the next step.
Incorrect information may result in verification delays or registration failure.
Step 7: Enter Your Home Address and Email Address
Click Next to continue to the address section.
Provide your complete residential address, including your house number, street, barangay, city or municipality, province, and ZIP code if required.
You should also enter a valid and active email address because Smart may use it to send important registration updates or confirmation messages.
Before proceeding, review the information to ensure everything is correct.
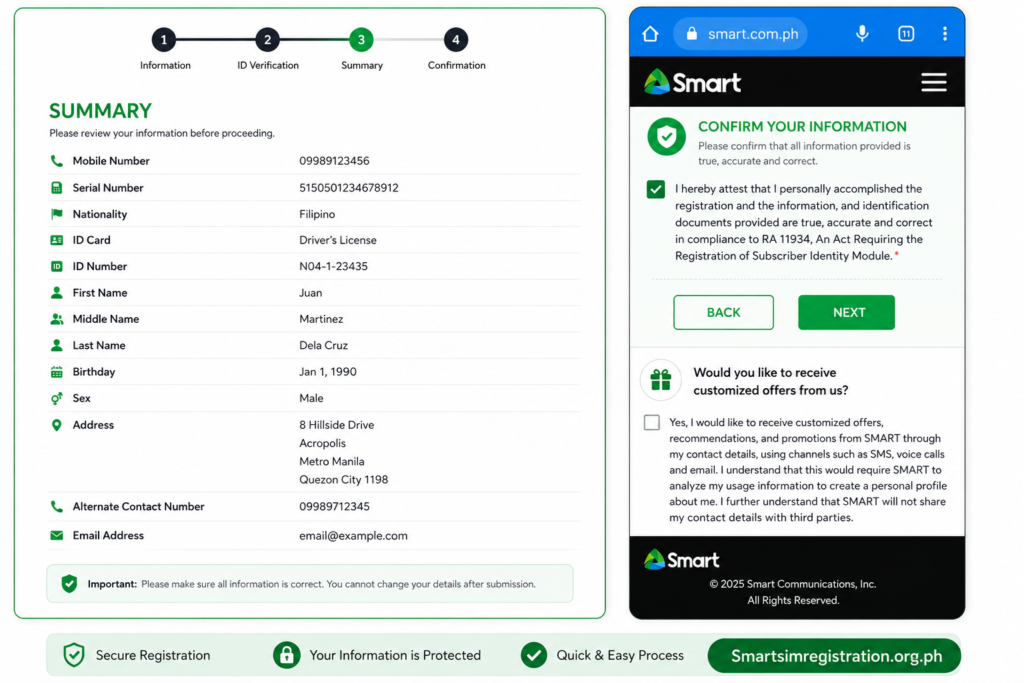
Step 8: Review All Your Information
Before submitting your registration, Smart will display a summary page containing all the information you have entered.
Take a few moments to carefully review every detail, including your mobile number, personal information, uploaded ID, and residential address.
If you notice any mistakes, go back and correct them before submitting the form.
Once you are satisfied that everything is accurate, tick the declaration checkbox confirming that all information provided is true and correct.
Click Next to continue.
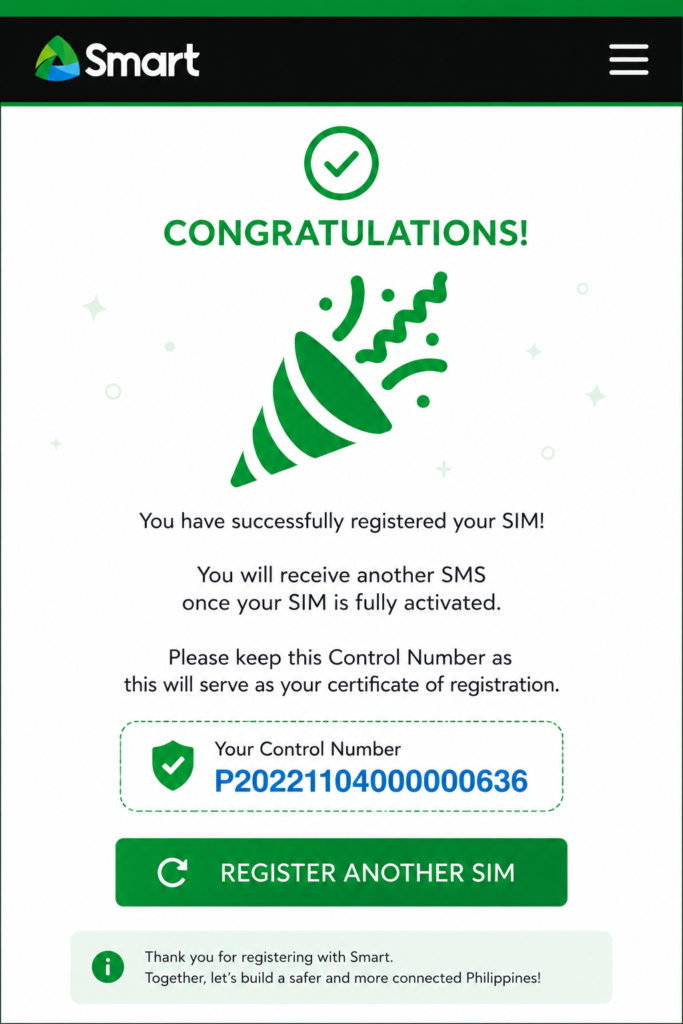
Step 9: Complete Your Smart SIM Registration
After submitting the form, Smart will process your registration request.
If everything is successful, a confirmation popup will appear along with your unique Control Number.
This number serves as proof that your Smart SIM registration has been completed successfully.
It is recommended to save the Control Number by taking a screenshot, writing it down, or keeping it in a secure place for future reference.
Before You Start Smart SIM Registration (2026)
Before starting the Smart SIM registration process, make sure you have everything ready. Preparing your information in advance will help you complete the registration in just a few minutes without interruptions.
Whether you’re registering a new Smart SIM or updating an existing Smart prepaid or postpaid SIM, you’ll need to provide accurate personal information and upload a valid government-issued ID.
Tip: Double-check that your ID details match the information you enter during registration. Incorrect information may delay the verification process.
Accepted Valid IDs
Smart accepts several government-issued IDs for verification.
| Accepted ID | Status |
|---|---|
| Philippine National ID (PhilSys) | ✅ Accepted |
| Passport | ✅ Accepted |
| Driver’s License | ✅ Accepted |
| UMID Card | ✅ Accepted |
| SSS ID | ✅ Accepted |
| PRC ID | ✅ Accepted |
| PhilHealth ID | ✅ Accepted |
| Postal ID | ✅ Accepted |
| Voter’s ID (if accepted) | ✅ When applicable |
Note: Your ID should be valid, undamaged, and clearly readable. Blurry or expired IDs may cause your registration to be rejected.
Why Preparing These Requirements Matters
Many registration problems happen because users upload blurry photos, use expired IDs, or enter incorrect personal information. Spending a few minutes preparing everything beforehand can save time and help you complete your Smart SIM registration successfully on the first attempt.
Once all your documents are ready, you’re prepared to begin the registration process.